
Building an Android App
from the Command Line
(4 January 2017)
Update 2024-03-01: Updated the article to use newer SDK, NDK, etc. and target Android API level 34.
I have been learning a bit of Android programming recently (late to the party, I know). One thing that frustrated me was figuring out how to actually build an Android application.
Things are simple enough with C. As explained in the first section of K&R, one might write this as a first program:
#include <stdio.h>

int main()
{
        printf("Hello, world!\n");
        return 0;
}
and turn it into an executable by simply invoking the system compiler as below.
$ cc hello.c
$ ./a.out
Hello, world!
This diagram illustrates the full process:

For Android, however, the official way to write Hello World is to fire up Android Studio, use its wizard to create a new project, and the application will then be generated and built automagically in a few minutes.
This is of course intended as a convenience for the developer, but for someone who wants to know what's going on, it makes things difficult instead. What actually happened? Which of all these files are really necessary for Hello World?
Others have expressed similar concerns:
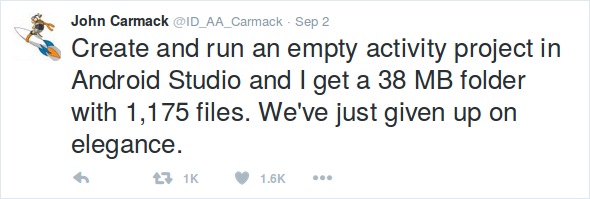
(For me, it generated a 50 MB directory containing 1,348 files spread across 630 subdirectories.)
Perhaps it is the control freak in me speaking (a good trait for programmers about their programs), but I simply don't feel comfortable not understanding how to build my own program.
Below are my notes on how to build an Android application by hand from the command line. The instructions are for Linux, but they should be easy to adapt to Mac or Windows. The full source code and a build script is available in command_line_android.tar.gz.
Table of Contents
Installing the Development Tools
Android applications are usually written in Java (or Kotlin these days), so building them requires having a Java Development Kit (JDK) installed. I downloaded the latest version from here, extracted and put it on my PATH like so:
$ curl -LO https://download.oracle.com/java/17/archive/jdk-17.0.10_linux-x64_bin.tar.gz
$ tar zxf jdk-17.0.10_linux-x64_bin.tar.gz
$ export JAVA_HOME="$PWD/jdk-17.0.10"
$ export PATH="$JAVA_HOME/bin:$PATH"
We create a directory for the Android software development kit, and set a variable to refer to it:
$ mkdir android_sdk
$ SDK="$PWD/android_sdk"
One way to get what we need is by using the Android Commandline Tools that can be found on the Android Studio download page. They provide the sdkmanager which can be used to fetch all the components we need:
$ curl -LO https://dl.google.com/android/repository/commandlinetools-linux-11076708_latest.zip
$ unzip -q commandlinetools-linux-11076708_latest.zip -d "$SDK"
$ "$SDK/cmdline-tools/bin/sdkmanager" --sdk_root="$SDK" --install \
      "platforms;android-34" "build-tools;34.0.0" "platform-tools" "ndk;26.2.11394342"
Or, we can fetch the components we need manually. What we need is build-tools (for aapt, d8, and apksigner), an Android Platform to target, and platform-tools (for adb).
$ curl -LO https://dl.google.com/android/repository/build-tools_r34-linux.zip
$ mkdir "$SDK/build-tools"
$ unzip -q build-tools_r34-linux.zip -d "$SDK/build-tools"
$ mv "$SDK/build-tools/android-14" "$SDK/build-tools/34.0.0"

$ curl -LO https://dl.google.com/android/repository/platform-34-ext7_r02.zip
$ mkdir "$SDK/platforms"
$ unzip -q platform-34-ext7_r02.zip -d "$SDK/platforms"

$ curl -LO https://dl.google.com/android/repository/platform-tools_r34.0.5-linux.zip
$ unzip -q platform-tools_r34.0.5-linux.zip -d "$SDK"

$ BUILD_TOOLS="$SDK/build-tools/34.0.0"
$ PLATFORM="$SDK/platforms/android-34"
The Hello World Program
Our Hello World program consists of three files: an application manifest, a layout and an Activity.
The app manifest is shown below (AndroidManifest.xml). It specifies the name of the app, which Android API it targets, etc. The intent-filter element sets up MainActivity as the main entry point of the program.
<?xml version="1.0" encoding="utf-8"?>
<manifest xmlns:android="http://schemas.android.com/apk/res/android"
          package="net.hanshq.hello"
          versionCode="1"
          versionName="0.1">
    <uses-sdk android:minSdkVersion="34"/>
    <application android:label="Hello">
        <activity android:name=".MainActivity" android:exported="true">
            <intent-filter>
                <action android:name="android.intent.action.MAIN"/>
                <category android:name="android.intent.category.LAUNCHER"/>
            </intent-filter>
        </activity>
    </application>
</manifest>
Below is the layout file (res/layout/activity_main.xml). It defines UI elements to be used in our program.
<?xml version="1.0" encoding="utf-8"?>
<LinearLayout
    xmlns:android="http://schemas.android.com/apk/res/android"
    android:layout_width="match_parent"
    android:layout_height="match_parent"
    android:gravity="center"
    android:orientation="vertical">

    <TextView
        android:layout_width="wrap_content"
        android:layout_height="wrap_content"
        android:id="@+id/my_text"/>
</LinearLayout>
Finally, the Activity is implemented like this: (java/net/hanshq/hello/MainActivity.java)
package net.hanshq.hello;

import android.app.Activity;
import android.os.Bundle;
import android.widget.TextView;

public class MainActivity extends Activity {
    @Override
    protected void onCreate(Bundle savedInstanceState) {
        super.onCreate(savedInstanceState);
        setContentView(R.layout.activity_main);

        TextView text = (TextView)findViewById(R.id.my_text);
        text.setText("Hello, world!");
    }
}
Building
All build artifacts will be put in subdirectories of the build directory which we create here.
$ mkdir -p build/gen build/obj build/apk
The first build step is to generate the R.java file, which is used for referring to resources (such as R.id.my_text above). This is done using the Android Asset Packaging Tool, aapt:
$ "$BUILD_TOOLS/aapt" package -f -m -J build/gen/ -S res \
      -M AndroidManifest.xml -I "$PLATFORM/android.jar"
which creates build/gen/net/hanshq/hello/R.java.
The -f flag causes aapt to overwrite any existing output file, -m causes it to create package directories under the output directory, and -J makes it generate the R.java file and sets the output directory. -S points out the resource directory, -M specifies the manifest, and -I adds the platform .jar as an "include file".
Now that all the Java code is ready, we can compile it using javac:
$ javac --release 11 -classpath "$PLATFORM/android.jar" -d build/obj \
      build/gen/net/hanshq/hello/R.java java/net/hanshq/hello/MainActivity.java
The Java compiler created .class files containing byte code for the Java Virtual Machine. That then has to be translated to Dalvik byte code using the d8 tool:
$ "$BUILD_TOOLS/d8" --release --lib "$PLATFORM/android.jar" \
      --output build/apk/ build/obj/net/hanshq/hello/*.class
We then package the contents of the build/apk/ directory together with the manifest and resources into an Android Application Package (APK) file, again using the aapt tool:
$ "$BUILD_TOOLS/aapt" package -f -M AndroidManifest.xml -S res/ \
      -I "$PLATFORM/android.jar" \
      -F build/Hello.unsigned.apk build/apk/
The application has now been built, but the APK file needs to be signed before any device will allow running it, even in debug mode, and zipaligned if we ever want to publish it in the Play Store.
First, we run the zipalign tool, which aligns uncompressed files in the APK on 4-byte boundaries, and any shared objects on page boundaries, for easier memory mapping:
$ "$BUILD_TOOLS/zipalign" -f -p 4 \
      build/Hello.unsigned.apk build/Hello.aligned.apk
Then we use the Java keytool to create a key store and key for signing:
$ keytool -genkeypair -keystore keystore.jks -alias androidkey \
      -validity 10000 -keyalg RSA -keysize 2048 \
      -storepass android -keypass android
What is your first and last name?
  [Unknown]:
What is the name of your organizational unit?
  [Unknown]:
What is the name of your organization?
  [Unknown]:
What is the name of your City or Locality?
  [Unknown]:
What is the name of your State or Province?
  [Unknown]:
What is the two-letter country code for this unit?
  [Unknown]:
Is CN=Unknown, OU=Unknown, O=Unknown, L=Unknown, ST=Unknown, C=Unknown correct?
  [no]:  yes
(you may want to put in more proper values of course.)
and use that key to sign our application with apksigner:
$ "$BUILD_TOOLS/apksigner" sign --ks keystore.jks \
      --ks-key-alias androidkey --ks-pass pass:android \
      --key-pass pass:android --out build/Hello.apk \
      build/Hello.aligned.apk
Et voilà, we have successfully built an Android application by hand from the command line! The diagram below illustrates the whole process.

(We skipped some common steps that aren't strictly necessary: linting and ProGuard.)
Running
We can install our freshly built APK on a device (which must have USB debugging enabled) using the Android Debug Bridge:
$ "$SDK/platform-tools/adb" install -r build/Hello.apk
and run it, either by starting it manually from the Launcher, or with adb:
$ "$SDK/platform-tools/adb" shell am start -n net.hanshq.hello/.MainActivity
Using Native Code
While Android applications are usually written in Java, they can also contain native code, that is, machine code to be run directly by the device's processor. This is useful for performance, as it removes the overhead from running Java code, and for portability, as it opens the platform to code written in other languages.
Adding native code to our program makes it a little harder to build, but it turns out not to be too bad.
The Android Native Development Kit (NDK) provides compilers and libraries for building C and C++ code for Android. It can be installed with the sdkmanager, or manually like this:
$ curl -LO https://dl.google.com/android/repository/android-ndk-r26c-linux.zip
$ mkdir "$SDK/ndk"
$ unzip -q android-ndk-r26c-linux.zip -d "$SDK/ndk"
$ NDK="$SDK/ndk/26.2.11394342"
$ mv "$SDK/ndk/android-ndk-r26c" "$NDK"
We set more shell variables to point at the specific toolchains we'll use: (if you're not using Linux, you'll want one of the other prebuilt directories)
$ ARM_CLANG="$NDK/toolchains/llvm/prebuilt/linux-x86_64/bin/armv7a-linux-androideabi33-clang"
$ ARM64_CLANG="$NDK/toolchains/llvm/prebuilt/linux-x86_64/bin/aarch64-linux-android33-clang"
$ X86_CLANG="$NDK/toolchains/llvm/prebuilt/linux-x86_64/bin/x86_64-linux-android33-clang"
We will update our Activity to use the Java Native Interface (see also Android JNI Tips) to call a new method, getMessage(), and use that method to set the text of the TextView. The method will be implemented in native code by a library called hello, which we load with System.loadLibrary in a static initializer block:
package net.hanshq.hello;

import android.app.Activity;
import android.os.Bundle;
import android.widget.TextView;

public class MainActivity extends Activity {
    static {
        System.loadLibrary("hello");
    }

    public native String getMessage();

    @Override
    protected void onCreate(Bundle savedInstanceState) {
        super.onCreate(savedInstanceState);
        setContentView(R.layout.activity_main);

        TextView text = (TextView)findViewById(R.id.my_text);
        text.setText(getMessage());
    }
}
The hello library must provide a native implementation of the getMessage method. To figure out what C function signature corresponds to the Java method, we invoke javac with the -h <dir> flag to generate a header:
$ javac -h /tmp --release 11 -classpath "$PLATFORM/android.jar" -d build/obj \
      build/gen/net/hanshq/hello/R.java java/net/hanshq/hello/MainActivity.java
$ grep -A1 _getMessage /tmp/net_hanshq_hello_MainActivity.h
JNIEXPORT jstring JNICALL Java_net_hanshq_hello_MainActivity_getMessage
  (JNIEnv *, jobject);
We implement it like this, in hello.c:
#include <stdlib.h>
#include <jni.h>

static const char *const messages[] = {
        "Hello, world!",
        "Hej världen!",
        "Bonjour, monde!",
        "Hallo Welt!"
};

JNIEXPORT jstring JNICALL
Java_net_hanshq_hello_MainActivity_getMessage(JNIEnv *env, jobject obj)
{
        int i;

        i = rand() % (sizeof(messages) / sizeof(messages[0]));

        return (*env)->NewStringUTF(env, messages[i]);
}
The C file is compiled into the shared library libhello.so (note the extra lib prefix). We build one for ARMv7, one for AArch64, and one for X86-64, to support most devices and emulators, and put them in the APK's lib/ directory:
$ mkdir -p build/apk/lib/armeabi-v7a build/apk/lib/arm64-v8a \
      build/apk/lib/x86_64

$ "$ARM_CLANG" -fpic -shared -o build/apk/lib/armeabi-v7a/libhello.so \
      jni/hello.c
$ "$ARM64_CLANG" -fpic -shared -o build/apk/lib/arm64-v8a/libhello.so \
      jni/hello.c
$ "$X86_CLANG" -fPIC -shared -o build/apk/lib/x86_64/libhello.so \
      jni/hello.c
(See the ABI Management doc for which ABIs can be targeted with the NDK, and under which lib/ directory to put the .so file.)
To build the APK, we repeat the build steps from above (aapt all the way to apksigner). The contents of the APK can be inspected with the jar tool:
$ jar tf build/Hello.apk
AndroidManifest.xml
classes.dex
lib/arm64-v8a/libhello.so
lib/armeabi-v7a/libhello.so
lib/x86_64/libhello.so
res/layout/activity_main.xml
resources.arsc
META-INF/ANDROIDK.SF
META-INF/ANDROIDK.RSA
META-INF/MANIFEST.MF
The file should contain the manifest, the Java classes converted to DEX format, our three native .so files, Application resources in raw (activity_main.xml) and binary (resources.arsc) form. The META-INF directory contains the JAR file manifest and cryptographic signatures.
When run, the application looks like this:

For a larger example, see the Othello project.