
The Old-School Fire Effect and
Bare-Metal Programming
(30 November 2017)
Many years ago, sometime in the nineties, my family was having dinner at the neighbours', and their son showed me some cool DOS programs on the computer. One of the programs was a demo that drew animated flames on the screen. I was amazed! Asking what language it was written in, I was told it was Pascal.
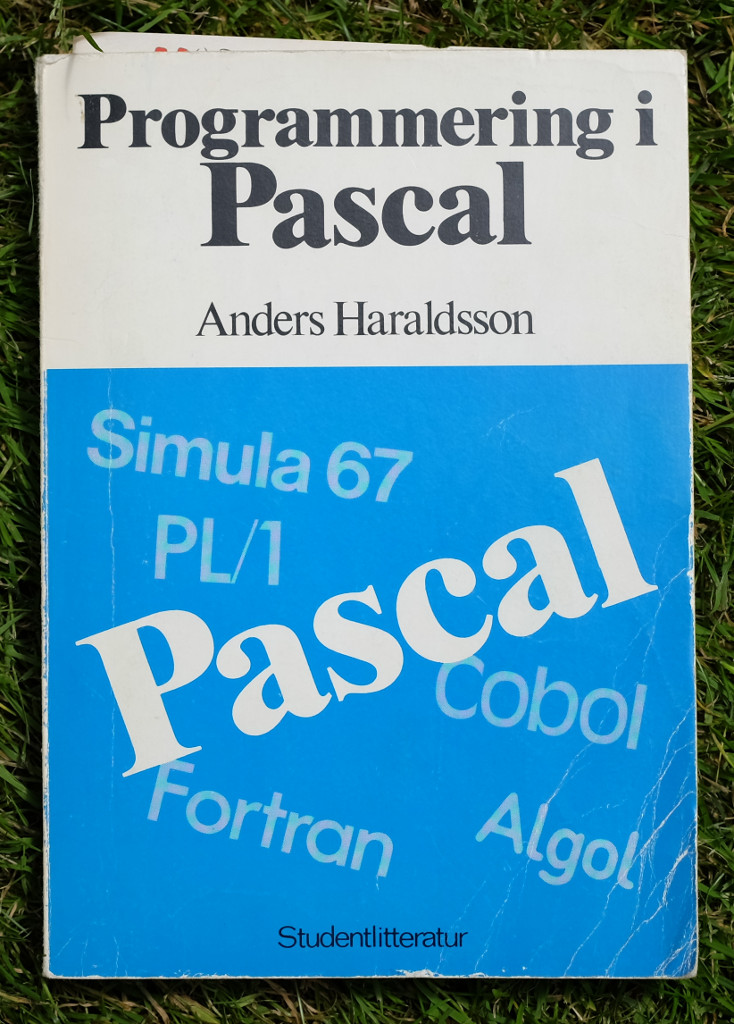 Until then I had only programmed in QBasic, but if one could make fire with Pascal, I was determined to learn it.
My uncle supplied me with his university text-book on the language, and I stepped to it. Unfortunately, the book turned out to be extremely thin on the subject of making fire. Also it was mainly concerned with programming the PDP-10 as opposed to the IBM PC that I was using. And so, I never learned the skill.
(There's a lesson here about the social aspects of programming: I could have asked more and much better questions of our neighbour.)
I've wanted to revisit this for years. Having acquired better programming, English, and web search skills, it's time to fill this gap in my education. This post contains a walk-through of the classic MS-DOS firedemo, a port of it to SDL, and an implementation of the fire effect that runs on bare-metal PCs.
Table of Contents
Firedemo
According to the internet, Javier "Jare" Arévalo's firedemo from 1993 was the first implementation of this effect. He wrote a blog post about it for the 20th anniversary, which includes a version in Javascript (source on GitHub).
When I asked about the firedemo, here's what he told me:
It began when we bought a 80387 math coprocessor and, to enjoy it, played a lot with a famous fractal generator called Fractint. Then I wanted to make a kind of plasma style fractal, but animated in a more complex way than the color rotation typical of the time. I just started writing some code without thinking much. A few bugs later, I had something that looked like small blue explosions that quickly faded to black. Tweaking the code rather than fixing the bugs got me the fire effect. We did realize how and why it looked like a fire, and JCAB's implementation in Inconexia was fully intentional and correct, but I never sat down to truly understand all the subtle bits in the original (where did the initial white explosion come from? Why was there no apparent "real" random number generator, yet it looked random?) until I recreated it in Javascript. As far as I can tell, the Javascript version is pixel perfect, it shows the exact same animation as the original did.
(FractInt still exists and has been ported to Linux. Jare released a plasma effect demo, iris, a few days after the fire demo. Inconexia (YouTube) uses the fire effect in the final scene.)
(I'm not sure whether this is the program I saw that night long ago, or if I saw one of the many other implementations that followed. Kirk A. Baum has collected some of them in firecode.zip, including a version that is indeed written in Pascal called Flames by Mark D. Mackey.)
Jare's firedemo.zip comes with source code in assembly. Let's dissect it to see how it works:
Data
; ------------------------------ FIRE.ASM ------------------------------
; Bye Jare of VangeliSTeam. Want more comments? Write'em. O:-)


        .MODEL SMALL
        .STACK 400
        DOSSEG
        LOCALS
This syntax suggests the code is written for Borland's Turbo Assembler. (I suppose this write-up serves as an answer to the call for more comments.)
        .DATA

FirePal LABEL BYTE
;  Fire palette, colors 0-63 ------------

        DB        0,   0,   0,   0,   1,   1,   0,   4,   5,   0,   7,   9
	DB	  0,   8,  11,   0,   9,  12,  15,   6,   8,  25,   4,   4
	DB	 33,   3,   3,  40,   2,   2,  48,   2,   2,  55,   1,   1
	DB	 63,   0,   0,  63,   0,   0,  63,   3,   0,  63,   7,   0
	DB	 63,  10,   0,  63,  13,   0,  63,  16,   0,  63,  20,   0
	DB	 63,  23,   0,  63,  26,   0,  63,  29,   0,  63,  33,   0
	DB	 63,  36,   0,  63,  39,   0,  63,  39,   0,  63,  40,   0
	DB	 63,  40,   0,  63,  41,   0,  63,  42,   0,  63,  42,   0
	DB	 63,  43,   0,  63,  44,   0,  63,  44,   0,  63,  45,   0
	DB	 63,  45,   0,  63,  46,   0,  63,  47,   0,  63,  47,   0
	DB	 63,  48,   0,  63,  49,   0,  63,  49,   0,  63,  50,   0
	DB	 63,  51,   0,  63,  51,   0,  63,  52,   0,  63,  53,   0
	DB	 63,  53,   0,  63,  54,   0,  63,  55,   0,  63,  55,   0
	DB	 63,  56,   0,  63,  57,   0,  63,  57,   0,  63,  58,   0
	DB	 63,  58,   0,  63,  59,   0,  63,  60,   0,  63,  60,   0
	DB	 63,  61,   0,  63,  62,   0,  63,  62,   0,  63,  63,   0
FirePal contains the first 64 colours of the palette that will be used, stored as (Red,Green,Blue) byte triplets with each value ranging between 0 and 63. The remaining 192 colours of the 256-colour palette are all white and will get set separately when programming the VGA palette.
ByeMsg  DB 'FIRE was coded bye Jare of VangeliSTeam, 9-10/5/93', 13, 10
        DB 'Sayonara', 13, 10, 10
        DB 'ELYSIUM music composed by Jester of Sanity (an Amiga demo group, I think)', 13, 10
        DB 'The music system you''ve just been listening is the VangeliSTracker 1.2b', 13, 10
        DB 'VangeliSTracker is Freeware (no money required), and distributed in source code', 13, 10
        DB 'If you haven''t got your copy of the VangeliSTracker, please go to your', 13, 10
        DB 'nearest BBS and get it NOW', 13, 10
        DB 'Also, don''t forget that YOU can join the VangeliSTeam. Contact the', 13, 10
        DB 'VangeliSTeam in the following addresses: ', 13, 10, 10
        DB '  Mail:     VangeliSTeam                          ³ This demo is dedicated to', 13, 10
        DB '            Juan Carlos Arévalo Baeza             ³        Mark J. Cox', 13, 10
        DB '            Apdo. de Correos 156.405              ³            and', 13, 10
        DB '            28080 - Madrid (Spain)                ³      Michael Abrash', 13, 10
        DB '  Internet: jarevalo@moises.ls.fi.upm.es          ³ At last, the PC showed good', 13, 10
        DB '  Fidonet:  2:341/27.16, 2:341/15.16, 2:341/9.21  ³ for something.', 13, 10, 10
        DB 'Greetings to all demo groups and MOD dudes around.', 13, 10
        DB '$'
ByeMsg contains the text that's printed before exiting the program. 13 and 10 are the ASCII character codes for carriage return and newline, respectively. The dollar sign signals the end of the string.
        UDATASEG

Imagen  DB 80*50 DUP (?)
Imagen2 DB 80*50 DUP (?)
These two 400-byte uninitialized arrays will be used for storing the intensity of the fire in each pixel. One array is for the current frame, and the other for the previous one.
Setting up the VGA
        .CODE
        .STARTUP

        CLD
        MOV     AX,13h
        INT     10h
        CLI
CLD clears the direction flag (the DF bit in FLAGS), which means the index registers SI and DI get incremented (as opposed to decremented) after each string operation, such as LODS and STOS below.
INT 10h raises an interrupt that's handled by the VGA BIOS, like a system call. The contents of the AH register (the high 8 bits of AX) specify the function, in our case 0 which means "Set video mode", and AL specifies which mode to set, in our case Mode 13h. This mode has a resolution of 320x200 pixels and 256 colors, specified with one byte per pixel in a linear address space starting at A000:0000. The BIOS configures this mode by writing specific values to the many VGA registers that control exactly how the contents of the VGA memory, the frame-buffer, is to be accessed and drawn onto the screen.
The CLI instruction disables interrupts. This is in order to protect the code that writes directly to VGA registers below. The code will perform OUT operations in a certain order, and could break if an interrupt handler performed other I/O operations in the middle.
        MOV     DX,3c4h
        MOV     AX,604h                 ; "Unchain my heart". And my VGA...
        OUT     DX,AX
        MOV     AX,0F02h                ; All planes
        OUT     DX,AX
Now the code starts to tweak the VGA registers, moving away from the standard Mode 13h. 3c4h, loaded into DX, is the I/O port number of the VGA Sequence Controller Index register (See The Graphics Programming Black Book Chapter 23 and FreeVGA).
By doing OUT DX,AX, the code writes the 16-bit value in AX to the port, which is effectively the same as writing the 8-bit value in AL to ec4h (Sequence Controller Index Register) and the 8-bit value in AH to ec5h (Sequence Controller Data Register). The Index Register selects an internal Sequence Controller register, and the Data Register provides the value to write into it.
In our case, the code is writing 06h to register index 04h, which is the Sequencer Memory Mode Register. This disables the Chain 4 bit which is otherwise set in mode 13h. This is what the "Unchain" comment refers to: turning off Chain-4 addressing mode and entering normal mode.
The VGA RAM is split into four different "planes", which were often implemented by four different memory chips on the circuit board. One reason was to solve the frame-buffer memory-access problem: to output 70 high-resolution frames per second, the VGA's CRT controller would need to read bytes at a higher rate than was feasible for a byte-addressed DRAM chip at the time. But with the frame-buffer split into four planes, stored in four chips, the CRT controller could read four bytes in parallel at a time, enough to keep up with the CRT refresh rate.
Chain 4 is a mode for addressing the four memory planes. When enabled, it uses the two least significant bits of the address to select which plane to read or write to (and leaves those two bits clear when addressing inside the plane, if I understand correctly), allowing linear addressing of the four planes "chained together". For example, writes to A000:0004, A000:0005, and A000:0006 in Chain 4 mode would end up at address 4 in plane 0, 1, and 2 respectively.
With Chain 4 disabled, the programmer has to explicitly select which plane(s) to access by setting the VGA Sequence Controller's Map Mask Register (index 02h). The write of 0Fh to that register enables writes to all four planes at once, hence the "All planes" comment. This means that each byte written to the framebuffer will get written to all four planes at that address, effectively appearing as four consecutive identical pixels.
        MOV     DX,3D4h
        MOV     AX,14h                  ; Disable dword mode
        OUT     DX,AX
        MOV     AX,0E317h               ; Enable byte mode.
        OUT     DX,AX
The VGA Sequence Controller controls how the frame-buffer is accessed from the CPU, but it's the CRT Controller that decides how to access the frame-buffer when scanning it to produce the video signal. 3D4h addresses the CRT Controller's Index Register (immediately followed by the Data Register). Writing 0014h to that port sets the Underline Location Register to zero, clearing the DW and DIV4 bits which enabled the double-word addressing mode that is normally used for scanning when Chain-4 is enabled. The write of E3h (the leading 0 in 0E317h is required for the assembler to recognize it as a number) to index 17h sets the Byte Mode bit in the CRTC Mode Control Register.
If I understand correctly, the reason for scanning to be done with double-word addressing in mode 13h is that Chain-4 clears the lower two address bits when writing into a plane. This means that after the scanner has read a value from each plane, it needs to increment the address by four (the size in bytes of a 32-bit "double word") to get to the next set of values.
        MOV     AL,9
        OUT     DX,AL
        INC     DX
        IN      AL,DX
        AND     AL,0E0h                 ; Duplicate each scan 8 times.
        ADD     AL,7
        OUT     DX,AL
The first two instructions above write 09h to the CRT Controller Index Register, which is the index of the Maximum Scan Line Register. Then DX is incremented to address the port of the CRT Controller Data Register, after which a byte is read, masked, added with 7, and written back, resulting in the Maximum Scan Line field of the register being set to 7, which means each scan line will be repeated eight (7+1) times.
Regular mode 13h produces 400 scan lines, with each scan line repeated twice for a vertical resolution of 200 pixels. With the operation above, the vertical resolution becomes 50 pixels instead. Mode 13h has a horizontal resolution of 320 pixels, but with our "unchaining" and writing to all four planes at once above, we now have a horizontal resolution of 80 pixels instead. In summary, these operations have changed from the standard 256-color 320-by-200 pixel mode 13h to a custom 256-color 80-by-50 mode.
Why is this lower resolution desirable? Aren't the pixels chunky enough in 320x200 mode? The reason was probably to make the program run faster. Computing the values for 80x50 pixels is much less work than for 320x200, so the lower resolution allows for producing more frames per second on a slow machine.
        MOV     DX,3c8h                 ; Setup palette.
        XOR     AL,AL
        OUT     DX,AL
        INC     DX
        MOV     CX,64*3
        MOV     SI,OFFSET FirePal       ; Prestored...
@@pl1:
         LODSB
         OUT    DX,AL
         LOOP   @@pl1
The DAC (Digital-to-Analog Converter) is the part of the video adapter responsible for converting the bits coming out of memory to an analog video signal that can be fed to a monitor. It contains 256 registers, mapping each possible byte value to an 18-bit color representation: 6 bits for red, green, and blue intensity, respectively. (The VGA also has something called the Palette RAM, which is different and used for EGA compatibility.)
To program the DAC, our program first writes a zero to 3c8h, the DAC Address Write Mode Register, signalling that it wishes to set the value of DAC register zero. It then writes repeatedly to port 3c9h, the DAC Data Register, three byte-sized writes for each of the 64 colours in FirePal (LODSB reads a byte from DS:SI and then increments SI, LOOP jumps to a label and decrements CX until it's zero).
        MOV     AL,63
        MOV     CX,192*3                ; And white heat.
@@pl2:
         OUT    DX,AL
         LOOP   @@pl2
The code above fills the remaining 192 DAC registers with "white heat": all-white (red, green and blue all 63) color values.
STI
STI turns interrupts back on, now that the code for setting up the VGA is done.
Main Loop
        MOV     AX,DS
        MOV     ES,AX
        MOV     DI,OFFSET Imagen        ; Cleanup both Images.
        MOV     CX,80*50
        XOR     AX,AX
        REP STOSW
Before we enter the main loop, the code above clears the Imagen and Imagen2 arrays using REP STOSW which performs a word-sized write (of AX which is zero) to ES:DI, increments DI, and repeats 400 (CX) times. Using word-sized writes means the code writes 800 bytes in total, clearing both arrays.
MainLoop:
        MOV     DX,3DAh                 ; Retrace sync.
@@vs1:
        IN      AL,DX
        TEST    AL,8
        JZ      @@vs1
@@vs2:
        IN      AL,DX
        TEST    AL,8
        JNZ     @@vs2
The main loop starts by reading from the 3DAh I/O port, which is the VGA's Input Status #1 Register, and checking the VRetrace bit. It loops first while the bit is zero and then while it's one, effectively waiting for it to go from one to zero, thus synchronizing the loop with the VGA refresh cycle.
        PUSH    DS
        POP     ES
        MOV     SI,81+OFFSET Imagen     ; Funny things start here. 8-P
        MOV     DI,81+OFFSET Imagen2
        MOV     CX,48*80-2
        XOR     BH,BH
Treating Imagen and Imagen2 as 80-by-50 two-dimensional arrays (matching the screen resolution), SI and DI are set up to point to the second element on the second row (counting from the top-left corner) of Imagen and Imagen2, respectively. CX will be used for the loop count, and BH is cleared to be used as a zero below.
@@lp:
        XOR     AX,AX
        ADD     AL,-1[SI]
        ADC     AH,BH
        ADD     AL,-80[SI]
        ADC     AH,BH
        ADD     AL,-79[SI]
        ADC     AH,BH
        ADD     AL,-81[SI]
        ADC     AH,BH
        ADD     AL,1[SI]
        ADC     AH,BH
        ADD     AL,80[SI]
        ADC     AH,BH
        ADD     AL,79[SI]
        ADC     AH,BH
        ADD     AL,81[SI]
        ADC     AH,BH
The code above sums together the values of all eight pixels neighbouring SI in Imagen into AX (-1[SI] is the pixel to the left of SI, -80[SI] is the pixel just above, etc.). First the low bits are added to AL, then any carry bit is added to AH using ADC.
It is because the code accesses neighbours of SI that it was set up to start at the second element of the second row in Imagen, and why the loop count in CX was chosen so the process will stop after the second-last element of the second-last row.
        ROR     AX,1
        ROR     AX,1
        ROR     AX,1
Rotating the bits in AX three steps to the right leaves AL containing the previous sum divided by eight, in other words it contains the average of the eight values surrounding SI. This is the core idea in the fire effect: computing the "heat" of each pixel as an average of its neighbours.
        TEST    AH,60h                  ; Wanna know why 60h? Me too.
        JNZ     @@nx                    ; This is pure experience.
After the ROR instructions, the three least significant bits of the sum of neighbours have ended up as the three highest bits of AH. This means that the TEST instruction effectively checks whether the two low bits of the sum were set. If they were not, we fall through to the code below. As the comment suggests, this was probably chosen somewhat randomly.
         CMP    DI,46*80+OFFSET Imagen2 ; And this was a bug.
         JNC    @@dec                   ; This one's by my cat.
          OR    AL,AL                   ; My dog coded here too.
          JZ    @@nx                    ; I helped my sister with this one.
@@dec:
           DEC  AL                      ; Yeah! Cool a bit, please.
The code above checks whether DI is past the first 46 rows of Imagen2, and if so jumps straight to @@dec. Otherwise, the code checks whether AL is greater than zero, and only proceeds to @@dec if so.
All this is effectively to decide whether to decrement AL, thereby "cooling" that pixel. If no cooling occurred, the screen would eventually fill with a single colour. Instead, the code cools pixels given the semi-random condition that the two low bits of the neighbour sum are zero (so roughly 25% of the time).
If AL is already zero however, decrementing doesn't "cool" it, but rather "re-ignites" it since the value wraps around to 255. The code only allows this for pixels in the lower four rows, which is how it "feeds the fire" from below. Note that when the program starts, all pixels are initially zero, so the low bits of the sum will be zero, and all pixels on the lower rows will ignite, causing the initial burst of flame.
@@nx:
        INC     SI
        STOSB
        LOOP    @@lp                    ; New image stored in Imagen2.
With the final value of AL computed, STOSB writes it to the address pointed to by DI which it also increments. SI is also incremented, and the loop repeats with the next pixel.
        MOV     SI,80+OFFSET Imagen2    ; Scrolling copy. :-)
        MOV     DI,OFFSET Imagen
        MOV     CX,40*48
        REP     MOVSW
With all the new pixel values in Imagen2, the program now copies them back to Imagen for next time. By starting the source pointer (SI) 80 bytes into the array, the copy effectively scrolls the contents up one line. The actual copying is done with REP MOVSW which performs 40*48 (CX) word-sized moves from DS:SI to ES:DI, incrementing SI and DI after each one. Only 40 moves are needed per line because they are word-sized, and only 48 lines are copied because the top line is discarded (by starting at offset 80) and the bottom line is all zeros.
        MOV     SI,80*43+OFFSET Imagen2 ; Get rid of some ashes.
        MOV     CX,6*80
        MOV     AH,22
@@rcl:
         MOV    AL,[SI]
         CMP    AL,15
         JNC    @@rcn
          SUB   AL,AH
          NEG   AL
          MOV   [SI],AL
@@rcn:
         INC    SI
         LOOP   @@rcl
By "ashes", the code means pixels with low heat values. Such pixels look a bit unsightly in the bottom lines, so to smooth things over, the code above loops over the pixels in the bottom six lines, looking for pixels with values lower than 15. For such pixels, the code subtracts 22 (AH), and negates the result (effectively computing 22 minus the pixel value), which brightens them up a bit.
        MOV     SI,80+OFFSET Imagen2    ; And show it.
        MOV     DI,0
        MOV     AX,0A000h
        MOV     ES,AX
        MOV     CX,40*48
        REP     MOVSW
With all the pixel values ready in Imagen2, the program copies them over to the 80x50 linearly addressed framebuffer at A000:0000 using the same "scrolling copy" technique as before. The frame will be displayed the next time the monitor refreshes.
        MOV     AH,1
        INT     16h
        JNZ     Bye
        JMP     MainLoop
After the frame has been copied to the graphics memory, the code invokes Int 16/AH=01h to check whether there's a keystroke in the keyboard buffer. If there's not, the MainLoop continues, otherwise it jumps to the code below.
Epilogue
Bye:
        XOR     AH,AH
        INT     16h
        MOV     AX,3
        INT     10h
        MOV     DX,OFFSET ByeMsg
        MOV     AH,9
        INT     21h
First, Int 16/AH=00h is invoked to retrieve the keystroke from the keyboard buffer (the result, in AX, is ignored). Then Int 10/AH=00h is used to reset the video mode back to 03h, which is the regular 80x25 16-color text mode. Finally, Int 21/AH=09h is used to write the goodbye message to the screen.
        MOV     AX,4C00h
        INT     21h

        END
; ------------------------------ End of FIRE.ASM ---------------------------
At the very end, Int 21/AH=4Ch terminates the program.
That's it: 200 lines of assembly and the rest is history.
Firedemo in SDL
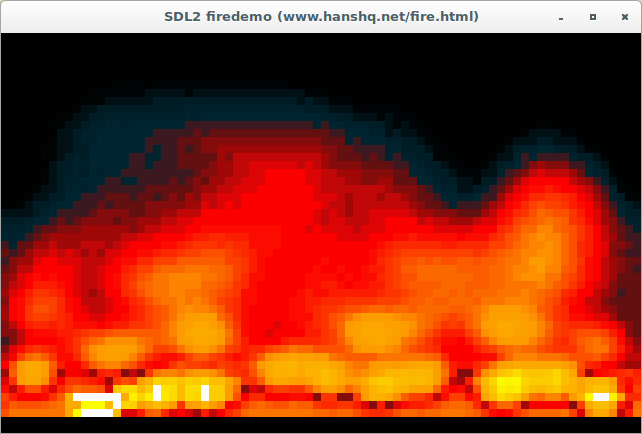
After reading through the original firedemo code above, I wanted to re-implement it to run on modern operating systems. In the Othello project, we did some graphical programming by using the native libraries (Xlib, Win32 GDI, Cocoa, etc.), but in this case we're not trying to build a graphical user interface, we just want to paint pixels on the screen. One popular cross-platform library for doing that, often used in games programming, is SDL (Simple Directmedia Layer).
The code below (available in fire.c) is a pixel-perfect port of the firedemo to SDL2. (It mainly follows this guidance from the SDL2 migration guide.) Hopefully it's a little easier to read than the assembly version.
#include <SDL.h>
#include <stdbool.h>
#include <stdio.h>

#define WIDTH 80
#define HEIGHT 50
#define WIN_WIDTH 640
#define WIN_HEIGHT 400
#define FPS 30

static const uint32_t palette[256] = {
/* Jare's original FirePal. */
#define C(r,g,b) ((((r) * 4) << 16) | ((g) * 4 << 8) | ((b) * 4))
C( 0,   0,   0), C( 0,   1,   1), C( 0,   4,   5), C( 0,   7,   9),
C( 0,   8,  11), C( 0,   9,  12), C(15,   6,   8), C(25,   4,   4),
C(33,   3,   3), C(40,   2,   2), C(48,   2,   2), C(55,   1,   1),
C(63,   0,   0), C(63,   0,   0), C(63,   3,   0), C(63,   7,   0),
C(63,  10,   0), C(63,  13,   0), C(63,  16,   0), C(63,  20,   0),
C(63,  23,   0), C(63,  26,   0), C(63,  29,   0), C(63,  33,   0),
C(63,  36,   0), C(63,  39,   0), C(63,  39,   0), C(63,  40,   0),
C(63,  40,   0), C(63,  41,   0), C(63,  42,   0), C(63,  42,   0),
C(63,  43,   0), C(63,  44,   0), C(63,  44,   0), C(63,  45,   0),
C(63,  45,   0), C(63,  46,   0), C(63,  47,   0), C(63,  47,   0),
C(63,  48,   0), C(63,  49,   0), C(63,  49,   0), C(63,  50,   0),
C(63,  51,   0), C(63,  51,   0), C(63,  52,   0), C(63,  53,   0),
C(63,  53,   0), C(63,  54,   0), C(63,  55,   0), C(63,  55,   0),
C(63,  56,   0), C(63,  57,   0), C(63,  57,   0), C(63,  58,   0),
C(63,  58,   0), C(63,  59,   0), C(63,  60,   0), C(63,  60,   0),
C(63,  61,   0), C(63,  62,   0), C(63,  62,   0), C(63,  63,   0),
/* Followed by "white heat". */
#define W C(63,63,63)
W, W, W, W, W, W, W, W, W, W, W, W, W, W, W, W, W, W, W, W, W, W, W, W,
W, W, W, W, W, W, W, W, W, W, W, W, W, W, W, W, W, W, W, W, W, W, W, W,
W, W, W, W, W, W, W, W, W, W, W, W, W, W, W, W, W, W, W, W, W, W, W, W,
W, W, W, W, W, W, W, W, W, W, W, W, W, W, W, W, W, W, W, W, W, W, W, W,
W, W, W, W, W, W, W, W, W, W, W, W, W, W, W, W, W, W, W, W, W, W, W, W,
W, W, W, W, W, W, W, W, W, W, W, W, W, W, W, W, W, W, W, W, W, W, W, W,
W, W, W, W, W, W, W, W, W, W, W, W, W, W, W, W, W, W, W, W, W, W, W, W,
W, W, W, W, W, W, W, W, W, W, W, W, W, W, W, W, W, W, W, W, W, W, W, W
#undef W
#undef C
};

static uint8_t fire[WIDTH * HEIGHT];
static uint8_t prev_fire[WIDTH * HEIGHT];
static uint32_t framebuf[WIDTH * HEIGHT];

int main()
{
        SDL_Window *window;
        SDL_Renderer *renderer;
        SDL_Texture *texture;
        SDL_Event event;
        int i;
        uint32_t sum;
        uint8_t avg;
        bool full_screen = false;
        bool keep_running = true;

        if (SDL_Init(SDL_INIT_VIDEO) < 0) {
                fprintf(stderr, "Failed SDL_Init: %s\n", SDL_GetError());
                return 1;
        }

        window = SDL_CreateWindow("SDL2 firedemo (www.hanshq.net/fire.html)",
                        SDL_WINDOWPOS_UNDEFINED, SDL_WINDOWPOS_UNDEFINED,
                        WIN_WIDTH, WIN_HEIGHT,
                        SDL_WINDOW_SHOWN | SDL_WINDOW_RESIZABLE);
        if (window == NULL) {
                fprintf(stderr, "Failed CreateWindow: %s\n", SDL_GetError());
                return 1;
        }

        renderer = SDL_CreateRenderer(window, -1, 0);
        if (renderer == NULL) {
                fprintf(stderr, "Failed CreateRenderer: %s\n", SDL_GetError());
                return 1;
        }

        texture = SDL_CreateTexture(renderer, SDL_PIXELFORMAT_ARGB8888,
                        SDL_TEXTUREACCESS_STREAMING, WIDTH, HEIGHT);
        if (texture == NULL) {
                fprintf(stderr, "Failed CreateTexture: %s\n", SDL_GetError());
                return 1;
        }


        while (keep_running) {
                while (SDL_PollEvent(&event)) {
                        if (event.type == SDL_QUIT) {
                                keep_running = false;
                        } else if (event.type == SDL_KEYDOWN) {
                                if (event.key.keysym.sym == SDLK_f) {
                                        full_screen = !full_screen;
                                        SDL_SetWindowFullscreen(window,
                                                full_screen ?
                                                SDL_WINDOW_FULLSCREEN_DESKTOP :
                                                0);
                                } else if (event.key.keysym.sym == SDLK_q) {
                                        keep_running = false;
                                }
                        }
                }

                for (i = WIDTH + 1; i < (HEIGHT - 1) * WIDTH - 1; i++) {
                        /* Average the eight neighbours. */
                        sum = prev_fire[i - WIDTH - 1] +
                              prev_fire[i - WIDTH    ] +
                              prev_fire[i - WIDTH + 1] +
                              prev_fire[i - 1] +
                              prev_fire[i + 1] +
                              prev_fire[i + WIDTH - 1] +
                              prev_fire[i + WIDTH    ] +
                              prev_fire[i + WIDTH + 1];
                        avg = (uint8_t)(sum / 8);

                        /* "Cool" the pixel if the two bottom bits of the
                           sum are clear (somewhat random). For the bottom
                           rows, cooling can overflow, causing "sparks". */
                        if (!(sum & 3) &&
                            (avg > 0 || i >= (HEIGHT - 4) * WIDTH)) {
                                avg--;
                        }
                        fire[i] = avg;
                }

                /* Copy back and scroll up one row.
                   The bottom row is all zeros, so it can be skipped. */
                for (i = 0; i < (HEIGHT - 2) * WIDTH; i++) {
                        prev_fire[i] = fire[i + WIDTH];
                }

                /* Remove dark pixels from the bottom rows (except again the
                   bottom row which is all zeros). */
                for (i = (HEIGHT - 7) * WIDTH; i < (HEIGHT - 1) * WIDTH; i++) {
                        if (fire[i] < 15) {
                                fire[i] = 22 - fire[i];
                        }
                }

                /* Copy to framebuffer and map to RGBA, scrolling up one row. */
                for (i = 0; i < (HEIGHT - 2) * WIDTH; i++) {
                        framebuf[i] = palette[fire[i + WIDTH]];
                }

                /* Update the texture and render it. */
                SDL_UpdateTexture(texture, NULL, framebuf,
                                WIDTH * sizeof(framebuf[0]));
                SDL_RenderClear(renderer);
                SDL_RenderCopy(renderer, texture, NULL, NULL);
                SDL_RenderPresent(renderer);

                SDL_Delay(1000 / FPS);
        }

        SDL_DestroyTexture(texture);
        SDL_DestroyRenderer(renderer);
        SDL_DestroyWindow(window);

        SDL_Quit();

        return 0;
}
To build and run the program on Debian GNU/Linux (or Ubuntu):
$ sudo apt-get install libsdl2-dev
$ gcc -O3 -o fire `sdl2-config --cflags --libs` fire.c
$ ./fire
To install SDL2 from MacPorts and build on Mac:
$ sudo port install libsdl2
$ clang -O3 -o fire `sdl2-config --cflags --libs` fire.c
$ ./fire
To build on Windows, download the latest "Visual C++ 32/64-bit" development library from the SDL 2.0 download page (currently the latest version is SDL2-devel-2.0.7-VC.zip). Extract that somewhere (I used C:\), and build in a Visual Studio Developer Command Prompt:
cl /O2 /DSDL_MAIN_HANDLED /Ic:\SDL2-2.0.7\include c:\SDL2-2.0.7\lib\x86\SDL2.lib fire.c
copy c:\SDL2-2.0.7\lib\x86\SDL2.dll .
fire.exe
The /DSDL_MAIN_HANDLED flag is to prevent SDL from replacing the main function. The copy is to make sure the SDL2.dll can be found when running the program.
(The program may not work in VirtualBox if video acceleration is not set up correctly. In that case, pass SDL_RENDERER_SOFTWARE instead of the 0 argument in the call to SDL_CreateRenderer.)
A New Fire Demo for DOS
I don't think the firedemo above was actually the program I saw that evening in the nineties. The way I remember it, the flames were just along the bottom of the screen. What I remember resembles much more what's described in Lode Vandevorde's Fire Effect tutorial.
One important difference in how that tutorial creates the fire is that it only averages pixel values from rows below the current one. This means the computation can be performed on a single buffer, in other words, there is no need to have separate buffers for the current and previous frame.
That makes things easier, and since the fire is located mostly along the bottom of the screen, it should be no problem running this in 320x200 resolution, even on a slow machine.
I've used this technique to make a little fire demo of my own (fire.asm):
        org 0x100       ; For .com file.

section .text
start:
        ; Enter mode 13h: 320x200, 1 byte (256 colors) per pixel.
        mov ax, 0x13
        int 0x10

        ; Make sure es and ds point to our segment (cs).
        push cs
        push cs
        pop ds
        pop es

        ; Write string.
        mov ax, 0x1300          ; ah=13h, al=write mode
        mov bx, 0xf             ; bh=page number (0), bl=attribute (white)
        mov cx, (msg_end - msg) ; cx=length
        mov dx, ((10 << 8) + (40 / 2 - (msg_end - msg) / 2)) ; dh=row, cl=column
        mov bp, msg             ; es:bp=string address
        int 0x10

        ; Set up the palette.
        ; Jare's original FirePal:
        cli             ; No interrupts while we do this, please.
        mov dx, 0x3c8   ; DAC Address Write Mode Register
        xor al, al
        out dx, al      ; Start setting DAC register 0
        inc dx          ; DAC Data Register
        mov cx, (firepal_end - firepal)
        mov si, firepal
setpal1:
        lodsb
        out dx, al      ; Set DAC register (3 byte writes per register)
        loop setpal1
        mov al, 63
        mov cx, (256 * 3 - (firepal_end - firepal))
setpal2:
        out dx, al      ; Set remaining registers to "white heat".
        loop setpal2
        sti             ; Re-enable interrupts.

        ; A buffer at offset 0x1000 from our segment will be used for preparing
        ; the frames. Copy the current framebuffer (the text) there.
        push 0xa000
        pop ds
        push cs
        pop ax
        add ax, 0x1000
        mov es, ax
        xor si, si
        xor di, di
        mov cx, (320 * 200 / 2)
        cld
        rep movsw       ; Copy two bytes at a time.

        push es
        pop ds
mainloop:
        ; On entry to the loop, es and ds should point to the scratch buffer.

        ; Since we'll be working "backwards" through the framebuffer, set the
        ; direction flag, meaning stosb etc. will decrement the index registers.
        std

        ; Let di point to the pixel to be written.
        mov di, (320 * 200 - 1)

        ; Write random values to the bottom row.
        ; For random numbers, use "x = 181 * x + 359" from
        ; Tom Dickens "Random Number Generator for Microcontrollers"
        ; http://home.earthlink.net/~tdickens/68hc11/random/68hc11random.html
        mov cx, 320
        xchg bp, ax     ; Fetch the seed from bp.
bottomrow:
        imul ax, 181
        add ax, 359
        xchg al, ah     ; It's the high 8 bits that are random.
        stosb
        xchg ah, al
        loop bottomrow
        xchg ax, bp     ; Store the seed in bp for next time.

        ; For the next 50 rows, propagate the fire upwards.
        mov cx, (320 * 50)
        mov si, di
        add si, 320     ; si points at the pixel below di.
propagate:
        ; Add the pixel below, below-left, below-right and two steps below.
        xor ax, ax
        mov al, [si]
        add al, [si - 1]
        adc ah, 0
        add al, [si + 1]
        adc ah, 0
        add al, [si + 320]
        adc ah, 0
        imul ax, 15
        shr ax, 6       ; Compute floor(sum * 15 / 64), averaging and cooling.
        stosb
        dec si
        loop propagate

        ; Mirror some of the fire onto the text.
        mov dx, 15              ; Loop count, decrementing.
        mov di, (90 * 320)      ; Destination pixel.
        mov si, (178 * 320)     ; Source pixel.
mirrorouter:
        mov cx, 320     ; Loop over each pixel in the row.
mirrorinner:
        mov al, [di]    ; Load destination pixel.
        test al, al     ; Check if its zero.
        lodsb           ; Load the source pixel into al.
        jnz mirrorwrite ; For non-zero destination pixel, don't zero al.
        xor al, al
mirrorwrite:
        stosb           ; Write al to the destination pixel.
        loop mirrorinner
        add si, 640     ; Bump si to the row below the one just processed.
        dec dx
        jnz mirrorouter

        ; Sleep for one system clock tick (about 1/18.2 s).
        xor ax, ax
        int 0x1a        ; Returns nbr of clock ticks in cx:dx.
        mov bx, dx
sleeploop:
        xor ax, ax
        int 0x1a
        cmp dx, bx
        je sleeploop

        ; Copy from the scratch buffer to the framebuffer.
        cld
        push 0xa000
        pop es
        mov cx, (320 * (200 - 3) / 2)
        xor si, si
        mov di, (320 * 3)       ; Scroll down three rows to avoid noisy pixels.
        rep movsw

        ; Restore es to point to the scratch buffer.
        push ds
        pop es

        ; Check for key press.
        mov ah, 1
        int 0x16
        jz mainloop

done:
        ; Fetch key from buffer.
        xor ah, ah
        int 0x16

        ; Return to mode 3.
        mov ax, 0x3
        int 0x10

        ; Exit with code 0.
        mov ax, 0x4c00
        int 0x21

; Data.
msg: db 'www.hanshq.net/fire.html'
msg_end:

firepal:
        db     0,   0,   0,   0,   1,   1,   0,   4,   5,   0,   7,   9
        db     0,   8,  11,   0,   9,  12,  15,   6,   8,  25,   4,   4
        db    33,   3,   3,  40,   2,   2,  48,   2,   2,  55,   1,   1
        db    63,   0,   0,  63,   0,   0,  63,   3,   0,  63,   7,   0
        db    63,  10,   0,  63,  13,   0,  63,  16,   0,  63,  20,   0
        db    63,  23,   0,  63,  26,   0,  63,  29,   0,  63,  33,   0
        db    63,  36,   0,  63,  39,   0,  63,  39,   0,  63,  40,   0
        db    63,  40,   0,  63,  41,   0,  63,  42,   0,  63,  42,   0
        db    63,  43,   0,  63,  44,   0,  63,  44,   0,  63,  45,   0
        db    63,  45,   0,  63,  46,   0,  63,  47,   0,  63,  47,   0
        db    63,  48,   0,  63,  49,   0,  63,  49,   0,  63,  50,   0
        db    63,  51,   0,  63,  51,   0,  63,  52,   0,  63,  53,   0
        db    63,  53,   0,  63,  54,   0,  63,  55,   0,  63,  55,   0
        db    63,  56,   0,  63,  57,   0,  63,  57,   0,  63,  58,   0
        db    63,  58,   0,  63,  59,   0,  63,  60,   0,  63,  60,   0
        db    63,  61,   0,  63,  62,   0,  63,  62,   0,  63,  63,   0
firepal_end:
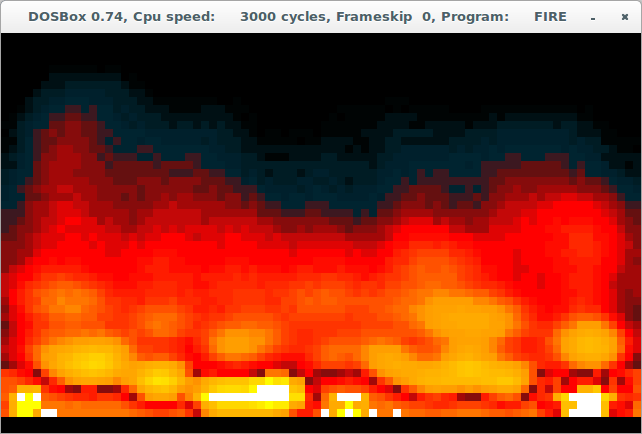
To assemble the program and run it with Dosbox on Linux:
$ sudo apt-get install nasm dosbox
$ nasm fire.asm -fbin -o fire.com
$ dosbox fire.com
(fire.com can also be downloaded here.)
On Mac:
$ sudo port install nasm dosbox
$ nasm fire.asm -fbin -o fire.com
$ dosbox fire.com
For Windows, the idea is the same, but you have to download the programs from the nasm and Dosbox web sites manually.
Running on Bare Metal
While the fire.com demo above runs under MS-DOS, the program doesn't actually use DOS for anything. In fact, it's not so much a DOS program as an IBM PC-compatible program: it's just 16-bit x86 code, some BIOS calls and fiddling with the VGA.
The exciting thing is that while PCs have gotten much faster and more capable in the last 20 years, the old stuff is still there. It should be possible to run my program on a modern PC, without the help of any operating system.
Running a program without an operating system is sometimes referred to as running on bare metal. This is most common in embedded systems, but it's possible on PCs as well.
When a PC starts, it first performs power-on self tests (POST), and then proceeds to load the operating system. Typically it loads it from the hard drive, but it can also boot from other devices such as a CD-ROM, USB stick or floppy disk.
The way a PC traditionally decides if it can boot from some medium is by reading the first sector (512 bytes) of it and checking whether that ends with the two magic bytes 0x55 0xAA, the Master Boot Record boot signature. If so, it loads that sector into memory at address 0000:7c00 and runs it.
Luckily, our program fits in well under 512 bytes, so to make it run as a Master Boot Record, we just have to make it expect to be loaded at 0000:7c00:
org 0x7c00
and insert padding and the magic bytes at the end:
        times (510 - ($ - $$)) db 0      ; Pad to 510 bytes
        db 0x55                          ; MBR boot signature.
        db 0xaa
We assemble it as before:
$ nasm fire.asm -fbin -o fire.img
and end up with fire.img which contains our program and functions as a Master Boot Record.
An easy way to test this is with VirtualBox. Configure a new virtual machine, load the .img file as a virtual floppy disk, start the machine and watch it boot into the fire demo.
To create a bootable USB stick with our demo from a Linux machine, insert a USB stick and check dmesg to see what device ID it gets assigned:
$ dmesg
..
[23722.398774] usb-storage 3-1.2:1.0: USB Mass Storage device detected
[23722.400366] scsi7 : usb-storage 3-1.2:1.0
[23723.402196] scsi 7:0:0:0: Direct-Access              USB DISK 2.0
[23723.402883] sd 7:0:0:0: Attached scsi generic sg4 type 0
[23726.611204] sd 7:0:0:0: [sdc] 15138816 512-byte logical blocks: (7.75 GB/7.21 GiB)
[23726.613778] sd 7:0:0:0: [sdc] Write Protect is off
[23726.613783] sd 7:0:0:0: [sdc] Mode Sense: 23 00 00 00
[23726.615824] sd 7:0:0:0: [sdc] No Caching mode page found
[23726.615829] sd 7:0:0:0: [sdc] Assuming drive cache: write through
[23726.629461]  sdc: sdc1
[23726.638104] sd 7:0:0:0: [sdc] Attached SCSI removable disk
Note: don't try this at home if you don't know what you're doing. Also don't try it at work.
To write the image to the USB stick (it will effectively delete all existing data on the USB device; make sure you got the right device ID and don't have anything important on it):
$ sudo dd if=fire.img of=/dev/sdc
1+0 records in
1+0 records out
512 bytes (512 B) copied, 0.000129039 s, 4.0 MB/s
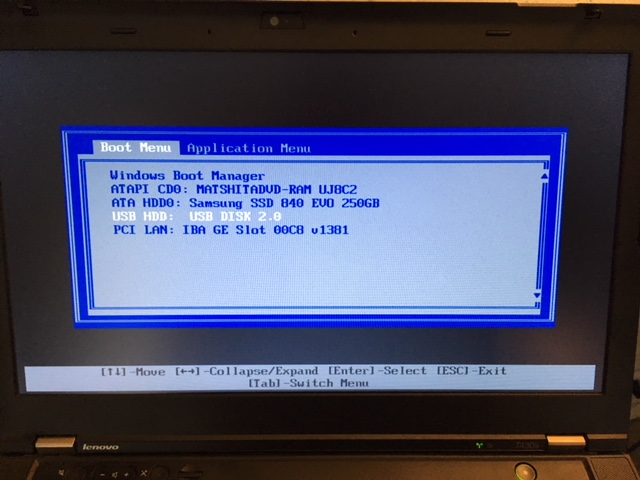
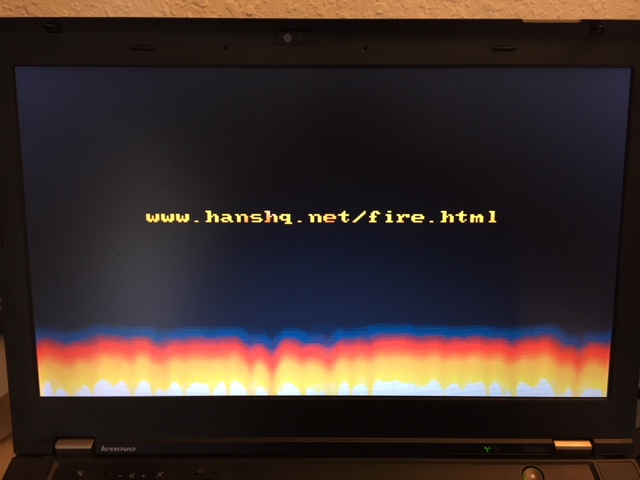
Restart the computer, boot from the USB stick (you might have to enter a BIOS menu to select boot device) and watch it run on a modern computer just like it would twenty years ago!
Further Reading
- Michael Abrash's Graphics Programming Black Book is full of information about the VGA, including techniques like "unchaining". The full text (web friendly version) is available online.
- Fabien Sanglard's Game Engine Black Book: Wolfenstein 3D has excellent explanations of the PC hardware of the early nineties and provided significant inspiration for this post. He later wrote an article describing the fire effect in the Playstation port of DOOM.